As an Amazon Associate this site earns from qualifying purchases.
If your ninja blender not turning on after lid replacement has you ready to toss the whole unit in the trash, take a breath: the culprit is almost always the safety interlock system, not a fried motor. Every Ninja blender uses hidden plunger switches inside the base and pitcher collar that must be triggered by the lid's tabs in an exact sequence. A new, aftermarket, or slightly mis-seated lid frequently fails to depress those switches, leaving the motor dead even though the unit has full power. The fix is mechanical, not electrical, and most owners resolve it in under five minutes once they know what to look for.
This guide walks through every common reason a Ninja blender refuses to start after a lid swap, from misaligned tabs to worn-out interlock plungers, plus how to tell when the lid itself is the wrong revision for your pitcher. By the end you'll know exactly which step to try first, when an aftermarket lid is safe to keep, and when it's time to order a genuine OEM replacement.
When shopping for ninja blender not turning on after lid replacement, it pays to compare specs, capacity, and real-world runtime before committing.
Why Ninja Blenders Refuse to Start After a Lid Swap
Ninja's safety design is unusually strict compared with older Oster or KitchenAid pitchers. The lid is not just a splash guard; it is a mechanical key. On most Auto-iQ, Professional, and Foodi models, two physical tabs on the rim of the lid drop into slots on the pitcher collar. Inside that collar sit two spring-loaded plungers that connect to a microswitch in the motor base. Unless both tabs depress both plungers to the correct depth, the base's logic board reads the pitcher as "open" and cuts power to the motor immediately.
Replacement lids fail this check for four common reasons:
- Wrong revision number. Ninja has quietly updated the tab geometry across model years. A lid sold as "fits BL660" may actually be cut for a later revision and sit 1-2 mm too high.
- Off-brand tabs are slightly short. Many third-party lids on Amazon look identical but use plastic tabs molded a hair shorter than OEM. The pitcher locks visually, but the interlock plunger never bottoms out.
- The new lid was forced on at an angle. If you twisted before seating, the gasket can compress unevenly and lift one corner of the lid just enough to release one of the two switches.
- The pitcher collar got pushed out of alignment. Removing a stuck old lid sometimes shifts the rubber bumper inside the collar where the plunger lives, so even a perfect lid no longer triggers anything.
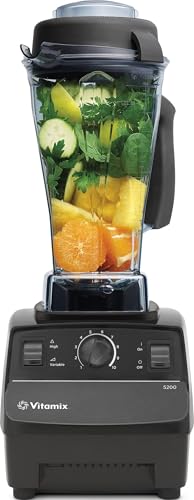
- Included: Vitamix 5200 blender motor base, 64-ounce classic container, and tamper; this kitchen blender container allows for small- to large-capacity blends
- 2 HP Motor: Equipped with a high-performance motor, this countertop blender lets you say goodbye to chunky smoothies and hello to effortless blends
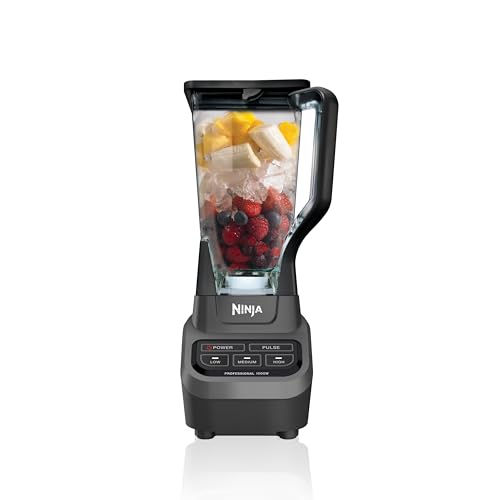
- PROFESSIONAL POWER: 1000 watts of professional power can crush ice and breakdown any tough ingredient.Power source : Corded Electric.Amperage : 12.5 amps
- XL CAPACITY: The 72 oz professional blender pitcher is excellent for making frozen drinks and creamy smoothies for the entire family. 64 oz. max liquid capacity
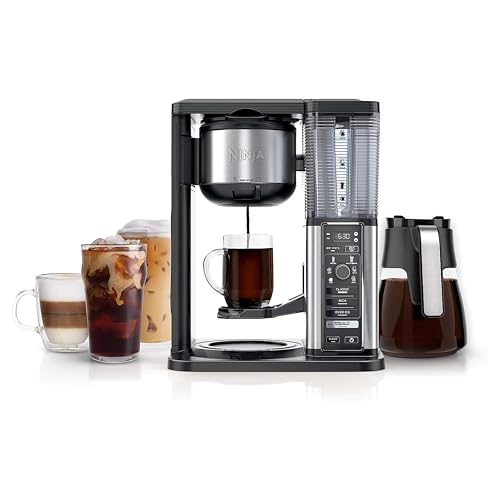
- 4 BREW STYLES: Select from one of the four, versatile brew styles: Classic, Rich, Over Ice, or Specialty Brew
- SPECIALTY BREWS: Brew a super-rich coffee concentrate that you can use to create delicious lattes, macchiatos, cappuccinos, and other coffeehouse-style drinks
Step-by-Step Troubleshooting Checklist
Work through these in order. Stop at the first one that brings the motor back to life.
Step 1: Confirm the base has power
Unplug the blender, wait 30 seconds, and plug it directly into a known-good wall outlet (skip the GFCI and the power strip for this test). On Auto-iQ models, the power button should light up the moment the pitcher is removed. If the indicator stays completely dark, the issue is upstream of the lid; check the cord, the outlet, and the internal fuse before doing anything else.
Step 2: Reseat the pitcher with the arrow alignment
Lift the pitcher off the base entirely. Look at the bottom of the pitcher and the top of the motor base: each one has a small triangular arrow. Drop the pitcher straight down with the arrows roughly aligned, then rotate clockwise until you feel a positive click. Many "dead after lid replacement" calls are actually a pitcher that got bumped during the lid swap.
Step 3: Inspect the new lid's tabs against the original
If you still have the old lid, stack the two lids upside down on a flat surface and compare the tab heights. A difference of even 1 mm is enough to defeat the interlock. If the new tabs are clearly shorter or have a different bevel, the lid is not a true match for your model, regardless of what the listing claimed.
Step 4: Lock the lid until you hear two clicks
Press the lid straight down with both palms, then rotate the handle until you feel the first click (gasket seated), then continue until you feel the second click (interlock engaged). Many users stop at the first click because the lid "feels" tight. The motor will not start until that second click engages.
Step 5: Press and hold the interlock plunger manually
With the pitcher off the base, look down into the collar where the lid tabs slot in. You should see a small plastic plunger flush with or slightly above the rim. Press it gently with a pencil eraser: it should travel about 3 mm and spring back crisply. A plunger that feels mushy, sticky, or refuses to return is the actual fault, and no lid will fix it. This is the moment to consider a full pitcher replacement.
Step 6: Power-cycle the logic board
On Auto-iQ and Foodi models, the controller can latch into a "lid open" error state after several failed start attempts. Unplug the base for a full two minutes, plug it back in, and try once more with the lid properly seated. This clears the latched fault on most units.
OEM vs. Aftermarket Replacement Lids: What Actually Matters
The replacement-lid market on Amazon is flooded with off-brand parts that photograph identically to genuine Ninja lids but use slightly different molds. For a part whose entire job is to satisfy a precision safety switch, those small differences matter.
Genuine Ninja-branded lids carry a small model number stamped on the underside (for example "XSK" followed by digits). Cross-reference that stamp with the model number on the bottom of your motor base before you buy. If a listing does not show the stamp clearly in the product photos, assume it is generic. Generic lids work fine on roughly half of units; the other half hit exactly the symptom in this article's title.
Routine cleaning also makes a measurable difference in how long any lid lasts. A buildup of dried smoothie residue on the tab edges adds thickness over time, throws off the interlock geometry, and can eventually warp the plastic. Our guide to cleaning and maintaining a countertop blender walks through how to keep gaskets and lid tabs in spec without using abrasives that strip the molded edges.
When to Replace the Whole Pitcher Instead of Just the Lid
If you reach Step 5 above and the interlock plunger inside the pitcher collar feels stuck, broken, or visibly out of position, no replacement lid will solve the problem. The plunger is sealed inside the collar and is not user-serviceable on most Ninja models. At that point you have three choices:
- Order a complete OEM pitcher and lid set for your model. This is the most reliable fix and typically costs 40-60% of a new blender.
- Order the original-revision pitcher assembly from Ninja's parts site (sharkninja.com/parts). Direct orders guarantee the correct stamp, but lead times can run 1-2 weeks.
- Upgrade the entire unit. If your blender is more than five years old and the motor brushes are noisy under load, replacing the pitcher buys you maybe another year. A new machine from our roundup of the top countertop blenders of 2026 may be the smarter spend.
If you decide to keep your existing Ninja but want to harden it against future lid problems, our tips for selecting a high-quality countertop blender covers the specific interlock and gasket designs that age best.
Preventing the Problem from Coming Back
Once you have the blender running again, a few habits keep the interlock healthy:
- Hand-wash the lid rather than running it through a heated dishwasher cycle. Heat warps the tabs faster than detergent does.
- Never store the blender with the lid locked in place. Constant compression flattens the gasket and lets the lid sag below the interlock trigger point.
- Wipe the inside lip of the pitcher collar weekly. Pulp dries hard and gradually pads out the plunger travel.
- If you blend hot liquids, vent and cool the lid before locking the next batch in. Repeated thermal expansion is the single largest cause of premature tab failure.
Following those four rules will typically push the next ninja blender not turning on after lid replacement episode out by years, even on heavily used daily-smoothie machines.
Frequently Asked Questions
Why does my Ninja blender light up but not spin after I replaced the lid?
The base has power but is reading the lid as open. Ninja's logic board energizes the indicator the moment the unit is plugged in, but it refuses to send current to the motor until both interlock switches register "closed." A new lid that sits even 1 mm high will leave the indicator lit and the blades motionless. Reseat with two firm clicks, and if that fails, compare the new lid's tab depth against the original.
Can I bypass the Ninja safety lid switch?
Technically yes, practically no. Owners have wedged toothpicks or tape into the interlock to force the switch closed, but doing so removes the only feature stopping a 1,000-watt motor from spinning while the lid is off. The risk of a hand or utensil being caught is not theoretical. If your interlock is broken, replace the pitcher; do not defeat the switch.
Are aftermarket Ninja blender lids safe to use?
Many work fine, but quality control varies wildly. Look for listings that show the underside stamp clearly, include the exact model numbers your blender matches, and have reviews specifically mentioning successful start-up (not just "fits great"). If your unit is a Professional Plus, Auto-iQ, or Foodi model, the tighter tolerances make OEM the safer choice.
How do I reset a Ninja blender that won't turn on?
Unplug the base, wait at least two full minutes, and plug it back into a non-GFCI outlet. This clears any latched error state on the logic board. Then reseat the pitcher with the arrows aligned and lock the lid until you feel two distinct clicks. If the unit still will not start, the interlock plunger inside the pitcher collar is the next thing to inspect.
What does a flashing red light on a Ninja blender mean?
On Auto-iQ models, a flashing red indicator almost always signals an interlock fault: either the pitcher is not fully seated, the lid is not fully locked, or the safety plunger is not triggering. Work through Steps 2 through 5 of the checklist above in order. A solid red light on Foodi models can also indicate a motor overheat condition; let the unit cool for 15 minutes before retrying.
How long do Ninja blender safety switches last?
The microswitch inside the base is rated for tens of thousands of cycles and rarely fails first. The weaker link is the plastic plunger inside the pitcher collar, which typically lasts 3-7 years of daily use before the spring fatigues or pulp residue causes it to stick. Regular cleaning (see our maintenance guide linked above) roughly doubles that lifespan.
Where can I buy a genuine Ninja replacement lid?
SharkNinja sells parts directly at sharkninja.com/parts, and that is the most reliable source for the exact revision matching your unit's stamp. Amazon also carries OEM lids, but you need to verify the seller is SharkNinja itself rather than a third party. For full transparency on how we evaluate the parts and accessories we recommend, see our affiliate disclosure.
Key Takeaways
- Choosing the right ninja blender not turning on after lid replacement means matching the key features to your specific needs and budget
- Read real customer reviews and check the return policy before you commit
- Also covers: ninja blender safety lock not working
- Also covers: ninja blender sensor lid problem
- Also covers: ninja blender wont start replacement lid
- Compare value across models — the priciest option is not always the best fit